Pages

Wednesday, October 31, 2012

Halloween Treats

Just thought I would share some of the treats we are giving to the kids tonight. I worked on the packaging all afternoon.
I've seen these treat holders online recently and decided to come up with one myself. I took the peppermint patties to use for the template and found it so easy to create them. Well starting to get kids at the door, got to run.

Saturday, October 13, 2012

Golf Lovers Birthday Card


It's been a very busy week for me. Here's another SVG file I created that was inspired by one of the graphics from J. Rett's Graphics website, I received it when I  was a member of her monthly graphics club. I'm in love with her graphics, be sure to check the website out. It was made for a very dear lady friend of mine for her birthday this past week. She's an artist and an avid golfer so I knew she would appreciate a card that was handmade over one that was store bought. I had a lot of fun designing the card and wanted to share it with you all. Thanks for dropping by my site.

Friday, October 12, 2012

Spooktacular Card

Here's a Spooktacular card I made with some of my own SVG files I've been designing. It's taken me some time to piece them together and then I decided the card needed depth so I took a stylus and hand embossed some of the cutouts. I also used glitter glue for the roof tops. Markers and ink pads were used to shade, highlight and color the pieces. It's not my best work but I enjoyed just playing with the different mediums to create the card. Let me know what you think and thanks for dropping by to take a look.


Items I Used:
Cricuit Expression
Marvy LePlume Markers
G-Studio Glitter Glue
Ink IT Up Inks
G-Studio Inks
DCWV Card base
Martha Stewart Drippy Blood Border Punch
Recollection CardStock
Heidi Grace Word Rub-ons
Misc scrap designer papers

Thursday, October 11, 2012

Wonderful Magic Cookie Bars

 I was in the kitchen yesterday quite a bit as you may already know if you are following my blog. I've been cleaning my very small pantry closet out and throwing away any expired products I find along the way. There were several bags of Nestles morsels that needed to be used up so I decided a dessert would be great to go with that big pot of chicken and dumplings. While researching the recipe for the dumplings, I ran across a recipe for Magic Cookie Bars and just knew that I would have to make it for the guys. I'm not a big fan of coconut but if it's toasted it wouldn't be terrible, lol. I had everything in the house to make them but some tweaking was needed as some of the items called for more than I had on hand. Here is my version of the cookie bars.

Magic Cookie Bars
Adapted from Food.com

Ingredients:
Servings: 16
3/4 cup butter, melted
2 1/2 cups graham cracker crumbs
1 (12 ounce) package peanut butter and milk chocolate chips
(Nestle toll-house makes a mix)
1 (14 ounce) can sweetened condensed milk
1/2 cup coconut
1/2 cup chopped pecans

Directions:
1
Melt butter and mix in the graham cracker crumbs.
2
Press the mixture into the bottom of an 9x9 pan or any other small baking dish you may have.
3
Drizzle the sweetened condensed milk over the top.
4
Sprinkle with the chocolate and peanut butter chips.
5
Sprinkle with the pecans.
6
Sprinkle with the coconut.
7
Bake for 25 minutes at 350°F. (Do Not Over-bake!)
8
Remove from oven and let cool for about 20 minutes before cutting. Then you can eat them but they are so much better cold. 

Success in the kitchen makes me a happy person. Thanks for dropping by to read my blog and if you use my version of this recipe let me know how they turned out by posting a comment. I'd love to hear from you.


Wednesday, October 10, 2012

Homemade Chicken and Dumplings...YUM!

I asked my husband what he wanted me to fix him for dinner and he replied Chicken and Dumplings. We'll feeling up to the challenge, I decide to dive right in and make the dish he wanted. It's been years since I actually made the dumplings from scratch so set out on the task of making homemade dumplings. I called my sister and ran it by her to make sure I wasn't forgetting but she hadn't made them in a long time either so I was on my own.

In hot pursuit to make the meal a success; I set out on a mission to refresh my memory. Well, I researched the web for a version close to what I wanted and found a recipe that was close to how I use to make them many years ago. I found a post by EatLiveRun at Tasty Kitchen Website with step by step instructions on how to make them. Click here for the recipe I used for the dumplings and the rest was from the family recipe we all use for stewing chicken. All I can say is the dish was yummy and so easy to make.  
Homemade Chicken and Dumplings

Monday, October 1, 2012

Batman Mini Album

I finally finished my daughter's baby shower gift. She loves, loves, loves Batman so I thought I make her a mini album for her to display pictures and share memories of the BatBaby. She has received and bought all kinds of Batman clothes she will be dressing the baby in or toys he will be playing with as he gets older. I wanted to make her something that no one else would have, a true one of the kind piece. The objective was to design a book that would be Batman comic book meets baby theme.

My inspiration started with this Batman Tear Bear from Patty's Crafty Spot. Patty had posted it on her website this past summer and I knew as soon as I seen him, I just had to have him. I contacted her to see if I could get one and she had it made and sent out the same day. The best customer service I've ever experienced. Is it not, the cutest thing?! Patty, thanks again for creating this wonderful bear.

I then came created the mini album using 6x9 kraft envelops I found in my craft supplies that I keep in the basement. I searched youtube to find a way to create the mini with the envelops. I've done a few with paper bags and envelops but not the large envelops. That's when I found J Ann B Designs - Youtube Channel. She has a tutorial for creating a mini album with an accordian binding, super easy. I followed her tutorial and created my mini album. I failed to get pictures of the base before covering it with the papers. I then went to work on creating the items I would use in the book. My cricuit was used along with an old version of Make the Cut that I've not updated so I can still use it to cut svg files from my computer.

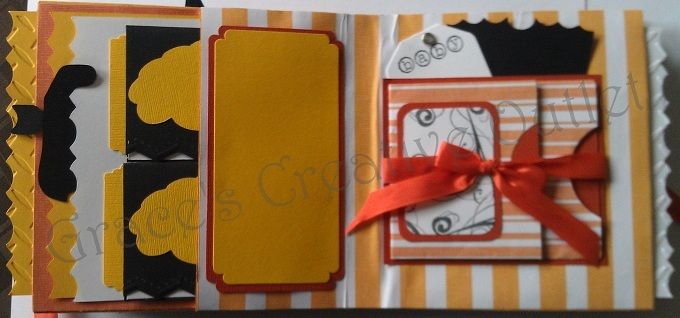
Page 1 from the album was designed for the Ultrasound pictures with the photo mats and journaling tags.


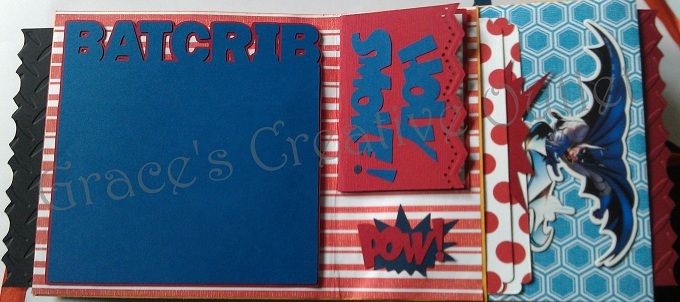
 The following page was created for the BatCrib photos and pictures of the room that my daughter painted as a large mural.


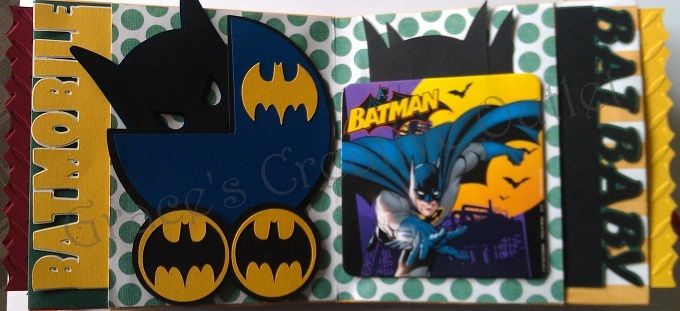
I then had to have a place to capture the Batmobile. Wanting to create more pockets that she could store photos, I ran across a Batman coaster so I used it to create another pocket. The batmobile took some doing but I finally decided that I would stick with a baby carriage converted to batmobile.


Knowing that she would want to take lots of photos, I created the next page for her to use for pictures as I tried to keep it simple.


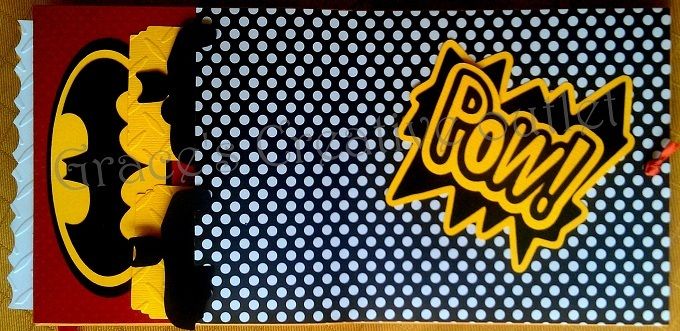
After some debate over the last inside page I left room for her to add to the book as she is also an artist and has a very creative mind. I created some more comic words and splats in keeping with the comic book theme.


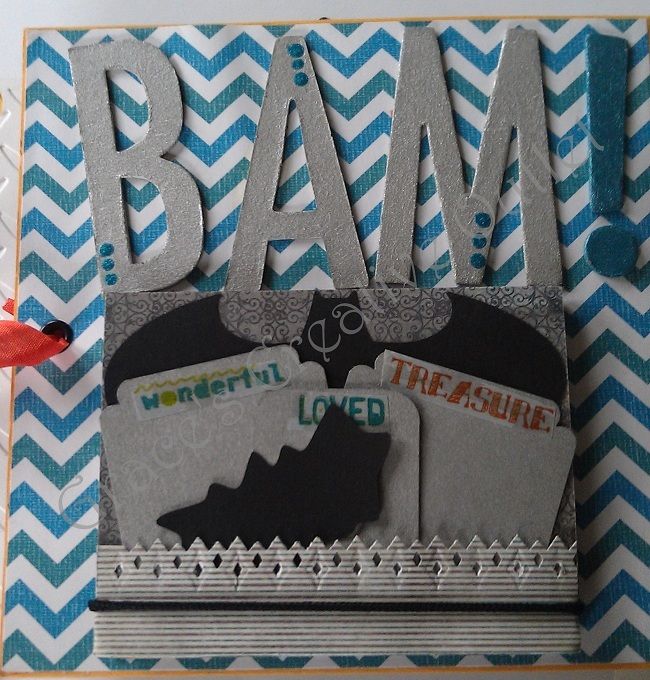
Finally the back cover of the album was created with a Batman PostIt note pad and her favorite comic word BAM! I attached the note pad with sticky tape and created more journaling tags.


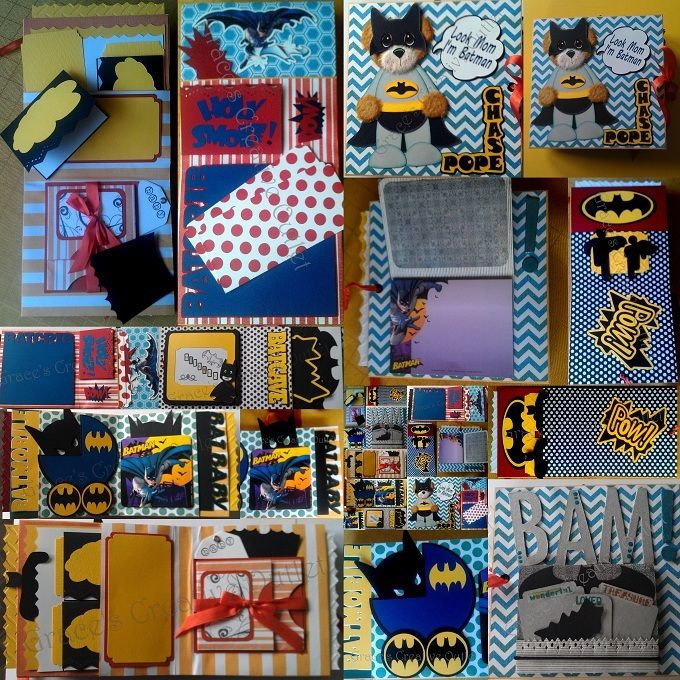
Here's a collage with all of the photos we've taken. I also have to give credit to my husband and son as they were very helpful in the creating of the book by giving me loads of ideas and suggestions. They were awesome!


Feel free to leave me feedback and comments, I look forward to hearing from you. I'm now off to start a new project.